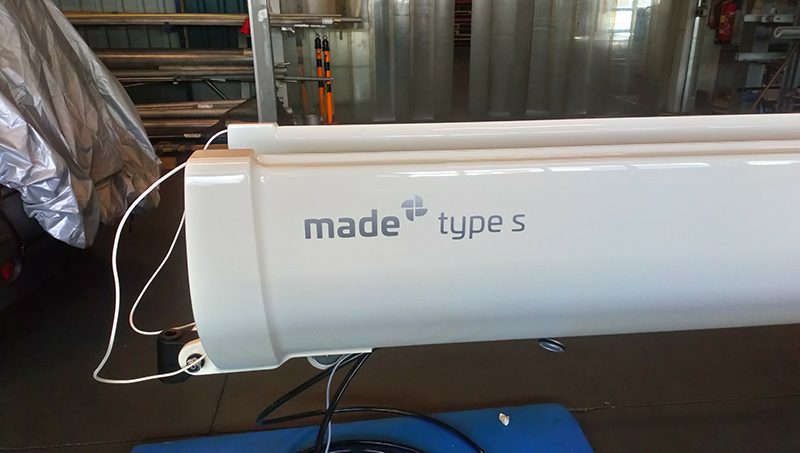
Boom for Little Zaca 73ft
Hydraulic driven furling boom
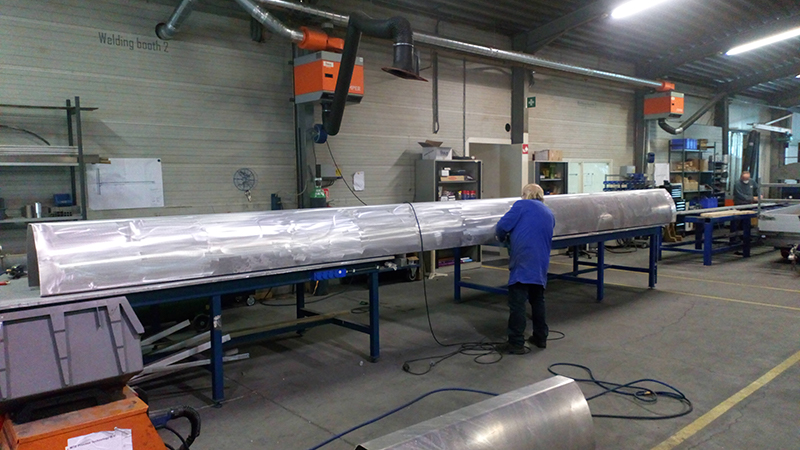
This project for a Made Type S furling boom was a bit of a special one because of its lenght. The boom is a bit longer than 9,5 mtr and although this is not uncommon for us it still is pretty big. We will take you through the process of the production of this beautiful boom.
Production
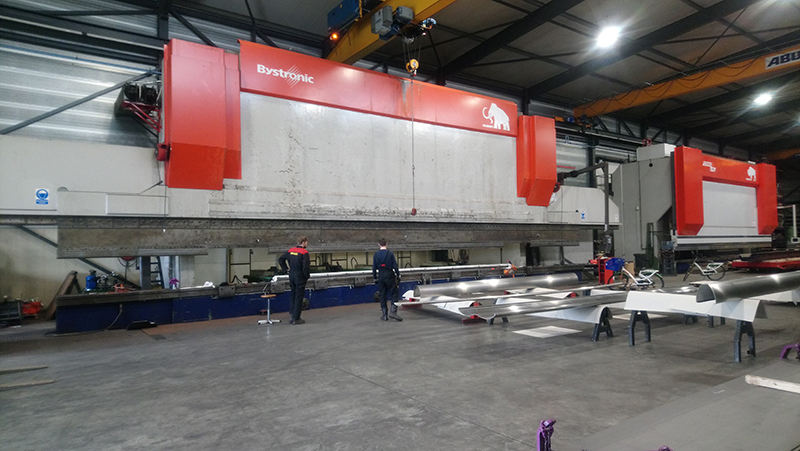
All Type S furling booms start as a sheet of aluminum. Our partner company bends these to form a outer body bottom tray and side stiffners. Obviously this must be done with great accuracy but in this case also with a pretty big piece of equipment. Luckily our partner is based next door and happens to have one of the biggest press brakes in the world.
After the bending the pieces are carefully sanded and prepared for welding. Although we prefer to bond the sheets togehter it is better to weld the aft and front end to body. This ensures that the parts will form a very strong construction which can cope with all the forces applied to it.
Bonding the sheets together
The majority of the sheets used to form the Type S body are bonded together with a high tech epoxy glue. Main reason to use bonding instead of welding is that we want to avoid that to much heat will be fed into the sheet. Bonding ensures that the boom body doesn’t warp. Another big advantage is that there is a incredible surface available to apply the bonding media on so on every spot where the sheet meet there is a mechanical connection.
Features
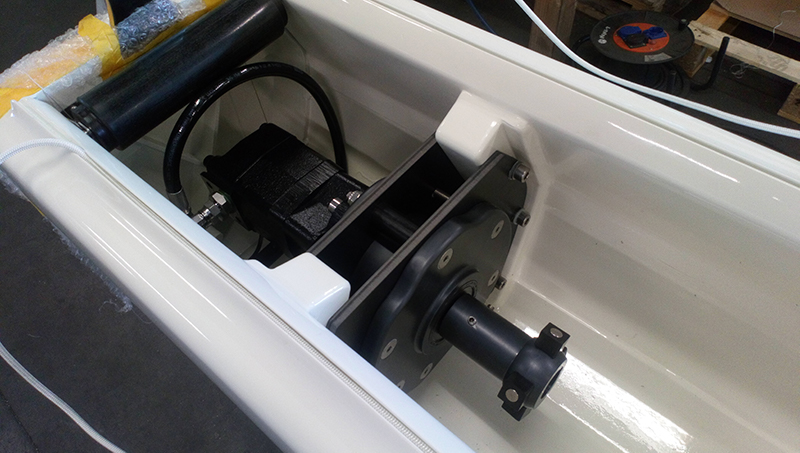
All starts with a boom body but clearly more is needed to form a complete Made Type S furling boom. For these bigger booms it is convenient to select either a electric drive or a hydraulic drive. Commonly a hydraulic system is already on board on bigger sized yachts and so was here. So the customer chose the hydraulic drive that we place aft of side of the boom. This drive consists of a hydraulic drive unit mated to a bespoke bearing/ sliding mandrel connector. The connector has the ability to slide so the mandrel can move longitudinal when the boom moves up or down.
All piping runs through the bottom of the boom, out of sight. This is a bit of a challenge because there are more features that require some of that space. Beside the hydraulic piping also the internal sheeting and electric cables for the lightning are installed there.
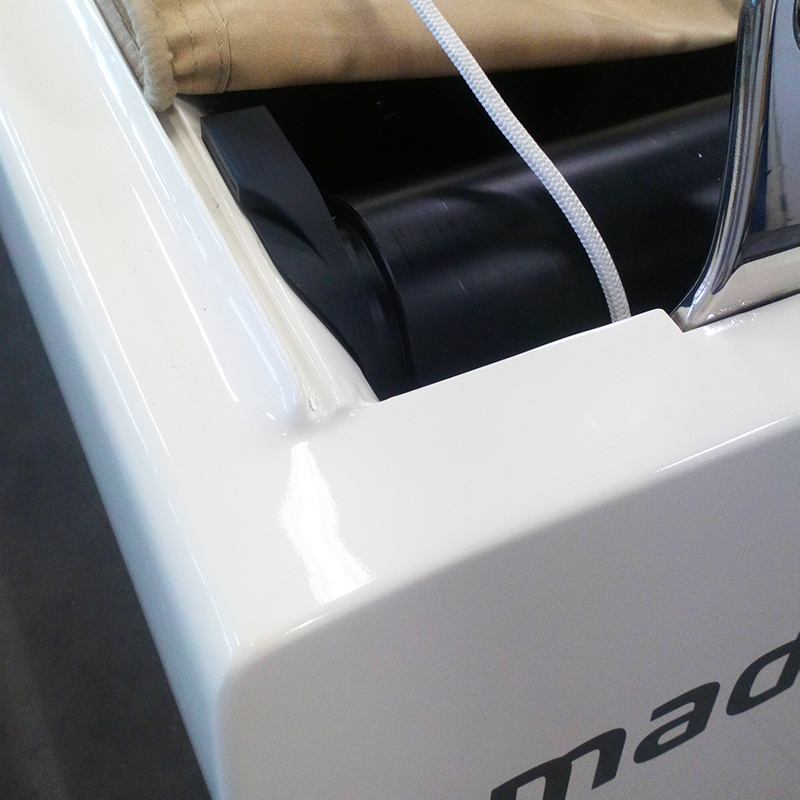
Boom cover
Even though there was not much space left in the bttom of the boom we manged to keep our well known integrated boom cover. In closed postion this cover protects the durled sail against the sun and rain. When the sail is hoisted the cover is completely stowed away in the bottom of the boom. This is achieved by pulling the two lines on the front side of the boom.
3d printing
For the production of our furling booms we sometimes need to be very creative to solve challenges. Especially when you are building custom furling booms like this particular one. So when we discovered that the cover did not slide over the rollers as it was supposed to do because it got stuck on several occasions we needed to engineer a solution. This solution was found quickly. We soon realized that there were multiple points where the cover got stuck and that there was not enough guiding to guide the cover into the track. We combined several solutions and 3d printed an ABS guide that now will be used for all bigger booms.
Configure your boom